
Seed-Starting 101: Transplanting and Troubleshooting
Even though it may feel like the timing if off, the calendar is progressing headlong into spring, and the daffodils--along with the just-unfurling green buds on the dreaded and omnipresent multiflora rose--will get here quickly. Soon, the earth will warm, and your seedlings will eagerly sink their bound roots into the big, living universe of your own garden's soil.
TRANSPLANTING
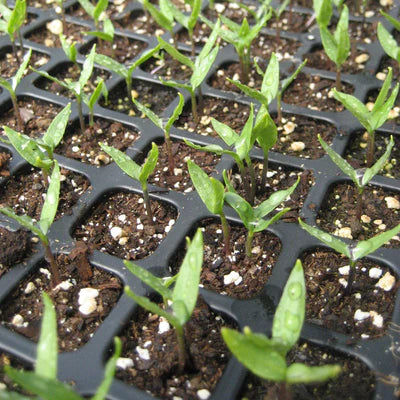
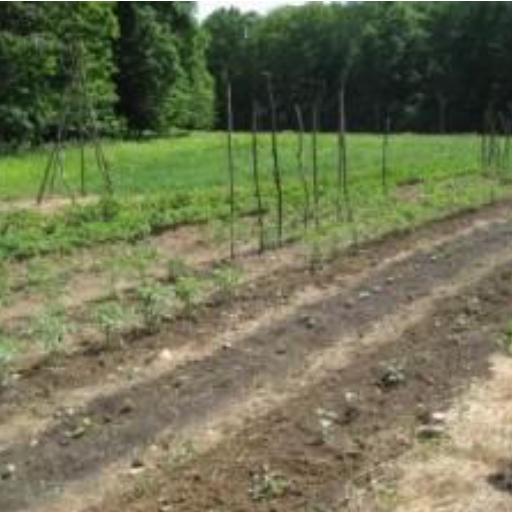
 Transplanted seedlings in rows.
Transplanting is an intuitive and extremely satisfying garden activity. Before transplanting, your bed is empty and shapeless; after transplanting, your garden comes alive with the rhythm and structure created by the rows, grids, circles, and freeform shapes your new transplants trace.
Most of us began our garden journey with an act of transplanting, usually a few tomato or basil or lettuce seedlings purchased from a garden center. And while transplanting is quite straightforward, there are definitely some things to keep in mind for the best results. Here are five thoughts.
- Only transplant properly hardened off seedlings. Hardening off seedlings--the process of gradually exposing them to longer and longer periods of unprotected, outdoor conditions (starting with about two hours per day, working up to ten or twelve over several days)--is essential to ensure the survival of seedlings grown indoors. There's no room for fudging here--especially with warm-weather crops such as peppers, eggplants, melons, and tomatoes. If you grew it indoors, it must adjust gradually to outdoor conditions. If you raise your seedlings in a cold frame, full hardening off is not necessary--just set your trays outside your cold frame for a day before transplanting.
- Transplant only on cloudy days or on late afternoons of sunny days. The act of transplanting is, by nature, stressful on the seedling. Bright, hot sun and desiccating winds amplify the shock: the poor seedling spends its limited resources in a struggle for water and purchase in the soil, rather than just settling in. Young seedlings are much happier when they are given a cool, moist, dark breather before facing their first day in a whole new environment.
- Prepare your bed thoroughly first. Incorporate compost and soil amendments before transplanting. It's best if the seedling can have at least a few days without much disturbance to its root system. It also needs a good, fertile environment in which to sink its roots, and few weeds to out-compete it. Work to provide these conditions before putting the seedling in the ground. Even if the seedling is getting root-bound, even if the calendar says its time to transplant, wait: the work of correcting poorly prepared soil is far more painful than exerting a little patience beforehand.
- Transplant gently. Once all the above conditions have been met, cut into the surface of your soil with a trowel or hand-held hoe to create a space for your seedling. Eject your seedling carefully from its container, and then set it into the space you've made. Except for tomatoes, nearly all vegetables should be transplanted so that the level of the soil surrounding the seedling is even with the level of the garden soil (tomatoes can be sunk more deeply--all the little hairs on the stem grow into roots). With your hands, push the surrounding soil towards the seedling to "seal it in"; pat the soil down so that the seedling is held in place firmly, as vertically as you can get it. Water in with a gentle setting on your hose (longer than you think--be sure that you do more than just a surface watering), and you're done!
- Consider the cutworm. If you're gardening a new plot--and often if you're not--you may face the dreaded cutworm, a small crawly creature that loves to fell young seedlings. It does its thing by forming a circle fully around the stem of a seedling and then chomping down. You'll instantly recognize the damage--it really does look like a felled tree. It mainly affects tomatoes, peppers, and eggplants, but it occasionally visits the stemmy bottoms of brassicas, too. To prevent this heartbreaker from ruining your day, put two toothpicks alongside and touching the stems of your transplants, one on each side of the stem. Do this at transplant time. The cutworm won't be able to fully encircle the seedling and will give up. (Rarely do cutworms venture higher than the height of an average toothpick.)
That's pretty much it! A few days after transplanting, your seedling should be well rooted, and cultivation with a hoe can take place.
TROUBLESHOOTING
Growing a garden is an invitation for trouble: thousands of other beings--from deer and woodchucks to bacteria and fungi--will be eyeing your vegetables just as hungrily as you are. While a good fence will keep the larger foes from your crops, the smaller ones are usually held at bay by the plant's own defense systems. The key is providing the conditions that allow the plant to be as strong and resilient as possible.
Below is a list of common troubles seen in garden plants during their early years, along with tips on keeping your seedlings strong, healthy, and resilient.
- Damping Off. Damping off is probably the single most common ailment seen in seedlings grown indoors. It is a fungal affliction in which the young seedling's stem withers at soil level; the seedling topples over and usually dies. The conditions that cause damping off are a combination of moisture and poor air circulation and moderate temperatures. The key to avoiding damping off is to refrain from overwatering--let the surface of the soil dry out a bit before each watering. It also helps to improve air flow, either with a fan or by moving your trays from a stuffy room to one that experiences greater air exchange. Some crops are notorious for damping off problems even when near-optimal conditions are provided: onions seem to be the most susceptible. (We lose some to damping off nearly every year.) Consider a damped off seedling or two to be a rite of passage--and then act quickly to improve conditions.
- Leaves turning purple. This condition arises in April and later, mainly, when your young seedlings have exhausted the available phosphorus in their potting soil. Organic phosphorus is released slowly, and only limited amounts are available in mixes that are designed for seedlings. If your seedlings are hanging out for too long in their trays without being transplanted, you will likely see their leaves begin to turn purpleish. Luckily, nearly all seedlings will recover from this state when transplanted to a healthy, well-composted garden soil; they may shed a leaf or two, but they'll probably do fine in the end.
- Yellow leaves/failure to thrive. Yellowing leaves are usually a symptom of nitrogen deficiency, which is usually only a problem in a potting soil that is not fully amended with compost and organic amendments such as seedmeals. Be sure that if you are using a sterile soilless mix that it either comes with fertilizer included or you are providing some yourself--or, better yet, choose an organic, compost-based mix from the start. But do be aware that any potting soil has limited resources to share with a seedling; keeping a seedling in a tray for too long will allow the plant to suck all the nutrition from the soil. Staying on top of transplanting will prevent such conditions.
- Tall, spindly seedlings. Thin, stretched out, pale seedlings are called "leggy." The condition arises from two causes: inadequate light and an overcrowded tray. I've said it once and I'll say it again: a sunny windowsill is usually not bright enough to grow good seedlings. Most leggy seedlings are grown on such a windowsill. Get a shop light with fluorescent bulbs or build a cold frame--you'll be amazed at how legginess goes away completely. If you believe your light is sufficient, examine the density of your seedlings: once the leaves of neighboring seedlings actually begin to touch each other, a race for light and air begins that makes the seedlings grow taller without filling out horizontally at the same time. If this is the case, either transplant immediately (if the timing is right for the variety) or pot up your seedlings to larger containers.
And with that, this spring series on seed-starting comes to an end. There is much more that could be written--growing food is an incredibly complex (and yet straightforward!) endeavor about which I could talk or write almost indefinitely. However, there are orders to ship and seeds to sow here, soil to prepare and a fence to mend. Spring is here, and the window of opportunity for so many great garden efforts is opening. Dive in, and good luck!