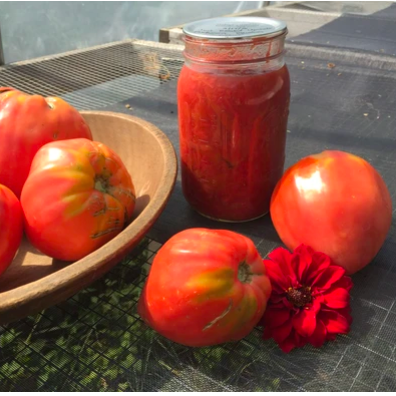
When August arrives each year, our gardens begin to overflow with bounty. The newness comes around each summer and hits us dreamy like new love. Then September swoops in quickly, which, when it ends, will carry most of those treats away when it departs. Such is the life cycle in a Northeastern garden. The weather stays hot just long enough to get us used to the rich, sweet flavors of summer, then yanks them away for the next 9 months. Fortunately, food preservation comes to our rescue. Scores of creative gardeners before us have figured out many ways to put up the summer harvest for the long, cold, dark evenings of winter.
Some methods require planning, equipment, and hours in the kitchen. Others are as passive a project as cleaning, waiting, then storing can be. The internet is full of recipes and tips for any ingredient or cooking method imaginable. Below are a few general preservation directions and tips to help guide your pantry planning and online searching this summer:
Drying requires little work and keeps your harvest off-the-grid, unfazed by power outages. Lighter items, like herbs, simply need to be hung upside down in an airy, dry, and shaded area for a couple of weeks. Once the leaves become crispy, they are ready to be jarred or bagged up and added to your spice collection. Shelling beans just need to be left unharvested until the pods fully dry. For full disclosure: this works only if the weather cooperates – our friend and amazing gardener Margaret Roach has great tips on her blog about growing and drying heirloom beans. Many, many other veggies dehydrate beautifully and can then be rehydrated for bright winter meals, but they do require a dehydrator. A greenhouse, the back of a hatchback car parked in the sun, or an oven turned to a low temperature and with the door ajar will do the trick but all can be tricky to regulate. For more specialized equipment, take a look at electric food dryer options or check out the many free plans for building solar ones (that’s what we use at the farm!).
Freezing is the surest way to maintain a vegetable or fruit’s original taste. Drying concentrates flavors, canning or pickling introduces new ones, but freezing suspends the tastes of summer in time (though it rarely does the same for texture). Herbs are best frozen in an ice cube tray in olive oil or water (they can then be tossed directly into a frying pan or a soup pot) or can also be rolled into a cigar and then sliced like bread as needed (this method was also inspired by Margaret Roach – take a look here for instructions). Most veggies are best briefly blanched before freezing so bacteria doesn’t grow and also so they don’t get tough and leathery. For exact blanching times, take a look the National Center for Home Preservation's website (lots of great information here on other preserving techniques too). Serving sizes are important to keep in mind when freezing your harvests. You don’t want to end up with a giant brick of tomatoes when making dinner for one. There are two ways to control this: either freeze in small batches or first freeze the veggies in a single layer on a cookie sheet, then scrape them off into a jar or bag – prefrozen, they won’t stick together.
Fermenting, at its most basic, is produce plus salt plus time. Fermentation adds nutrients to food as it invites beneficial bacteria into the process, but it does take a little getting used to, a little guidance, and a little bravery. Sandor Katz is our go-to fermentation master around here – he’s written a couple very comprehensive books on the subject and is captain of an active online fermenting community. When planning your winter pantry, do keep in mind that most fermented foods will need to eventually be refrigerated, so save room for the sauerkraut and beet kvass.
Canning is the baking of preservation: follow exact instructions and you’ll arrive at the desired result. Equipment ranges from a water bath (a big pot with a raised bottom for boiling jars to a seal) to a pressure canner (for a wider range of can-able foods). Canning, like drying, also falls under off-the-grid preservation, because the end result can be stored in a pantry, without refrigeration. To get you started, take a look at this beginner’s canning guide from a gardener in the Berkshires. The only advice we can add is: don’t can all summer, and don’t can in a heat wave. With canning, it helps to be organized: during a particular vegetable or fruit’s peak in the season, set aside a few kitchen hours for canning a large batch and be done with that variety for the year.
A Root Cellar is as timeless as it is effective. By keeping (most) root veggies cold (between 32 and 40 degrees) and humid (between 80 and 95%), their shelf life can be extended for weeks and often months. Although not too many of us are lucky enough to live in a home with a real underground cellar, the same result can be achieved in a basement, or even a buried cooler (that’s what Ken and Doug use!). For cellaring inspiration, take a look at this stream of ideas. And, for instructions on optimal storage for each kind of vegetable, see this guide from Cornell.
Don’t forget to label and date everything - It’s easy to forget what’s what in a full pantry.
And, always remember to eat your harvest fresh first!


